
Bluestacks “not working” Issue on PC (Windows 10, 11): Steps you should know on “How to fix Hyper-V (Virtualization)”
Bluestacks not working issue and error of Hyper-V (Virtualization)”
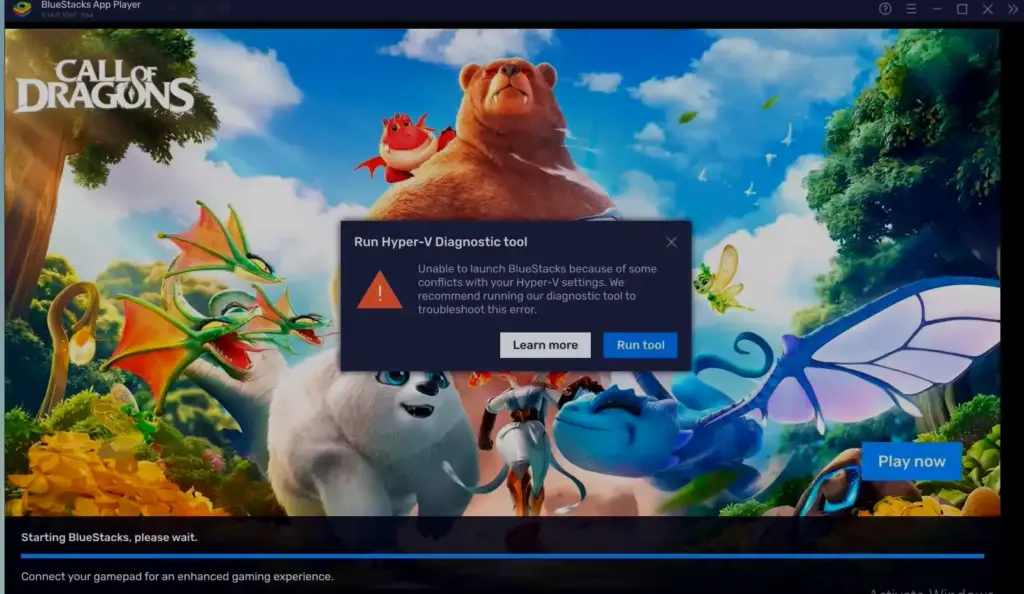
After installing the Bluestacks emulator on your PC, you might have faced an error of Hyper-V (Virtualization) while trying to run the application. Don’t worry at all. Below is the complete step-by-step guide with images to show you how to enable the Hyper-V virtualization settings on your desktop or Laptop (Windows 10 and 11).
If you double click on the emulator app and you see the error just like below, (Unable to launch Bluestacks because of some conflicts with your Hyper-V settings…),
Step-by-Step Guide for Fixing Blue Stack not working issue on PC
Step 1
Go to the “Windows” icon as shown in the image below and search by typing in the search bar, “Windows features turn on or off”

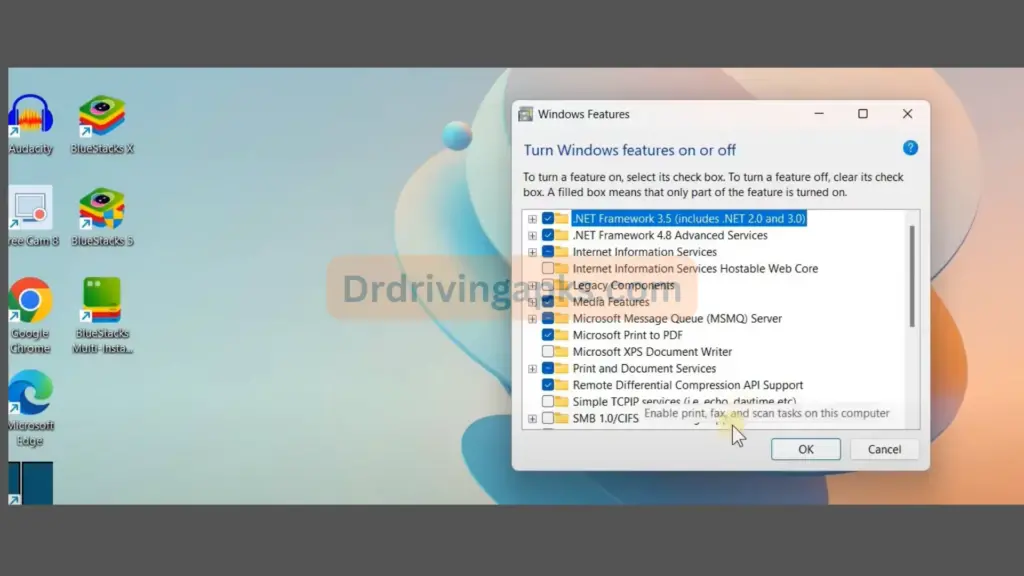
step 2
Now a new window will open just like below
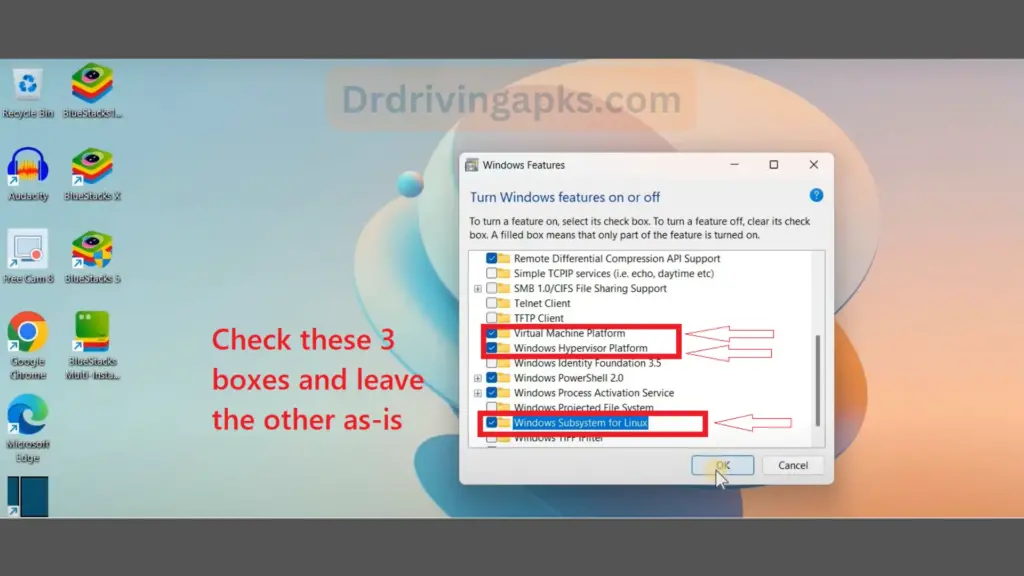
Most Important part:
From here, please check (Tick) the 3 settings as shown below to enable them;
- Enable “Virtual Machine Platform”
- Enable “Windows Hypervisor Platform”
- Enable “Windows Subsystem for Linux”
Then Click OK to apply.
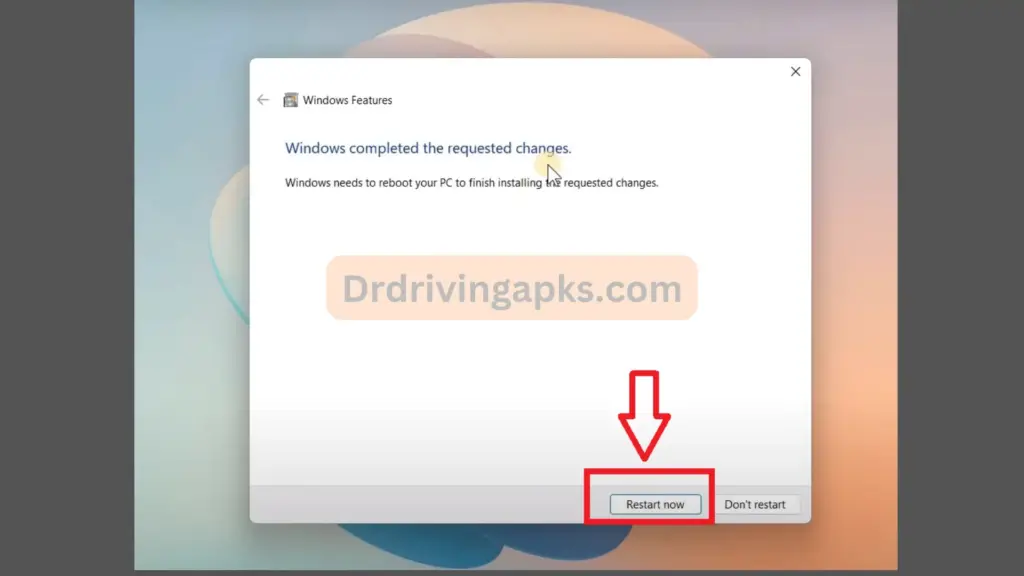
Step 3
Now the system will ask you to Restart the PC / Laptop after the above settings have been applied.
step 4
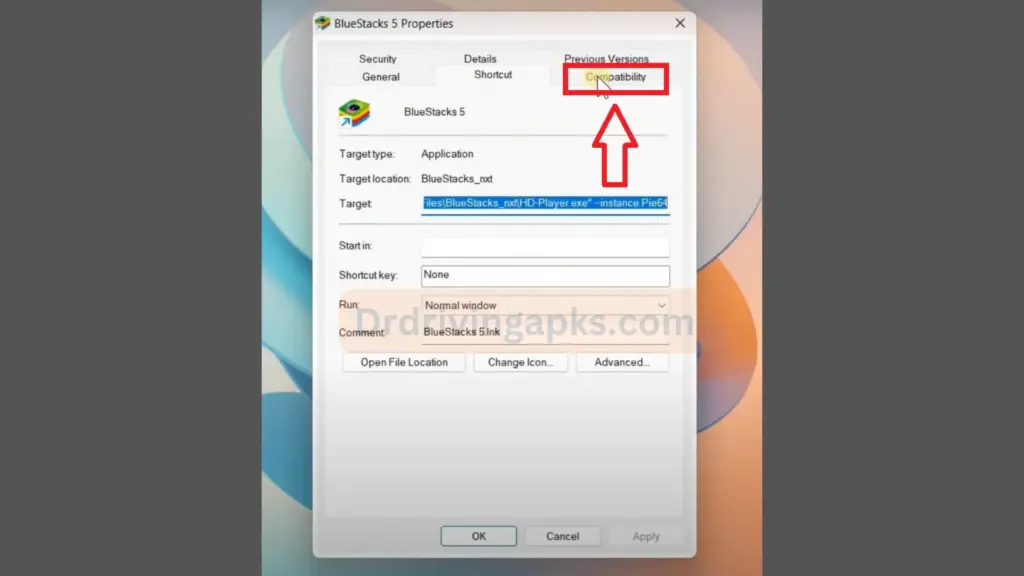
Now head over to the Bluestacks icon on your desktop and right click on it, then click on Properties.

Step 5
Here you will find the “Compatibility” tab, Click on it and check the box “Run this program in compatibility mode for:” and select “Windows 8” from the dropdown list as shown below. Also, Check the box “Run this program as an administrator”
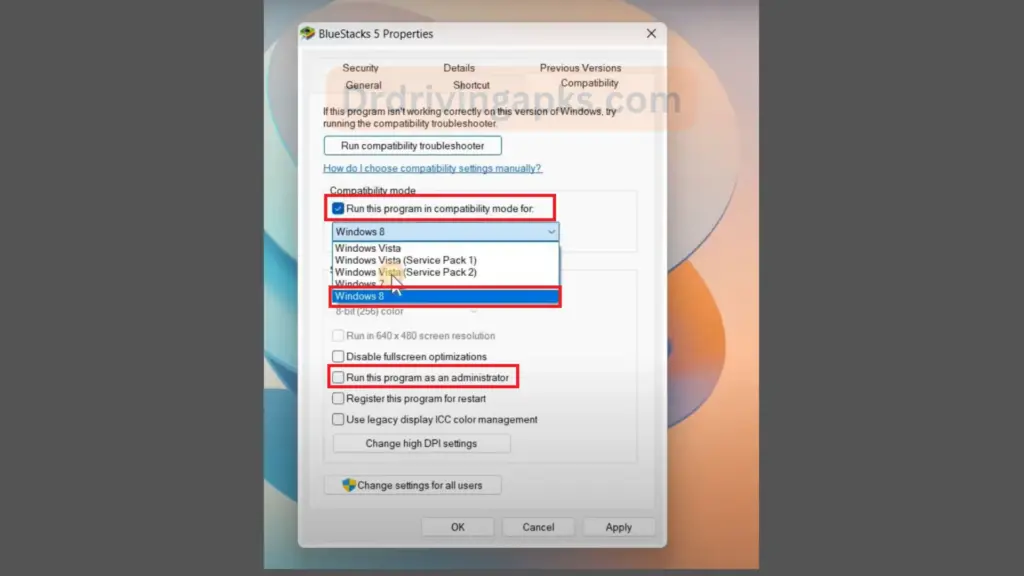
Final Step:
Finally, click on “Apply” and “OK” and close the window. Hurray!! You have successfully resolved the issue of a Hyper-V compatibility error on your PC. Now you can play Dr. Driving with full zeal and zest. Still, if you are facing any issues, feel free to comment below and elaborate on your problem and we will be happy to assist.